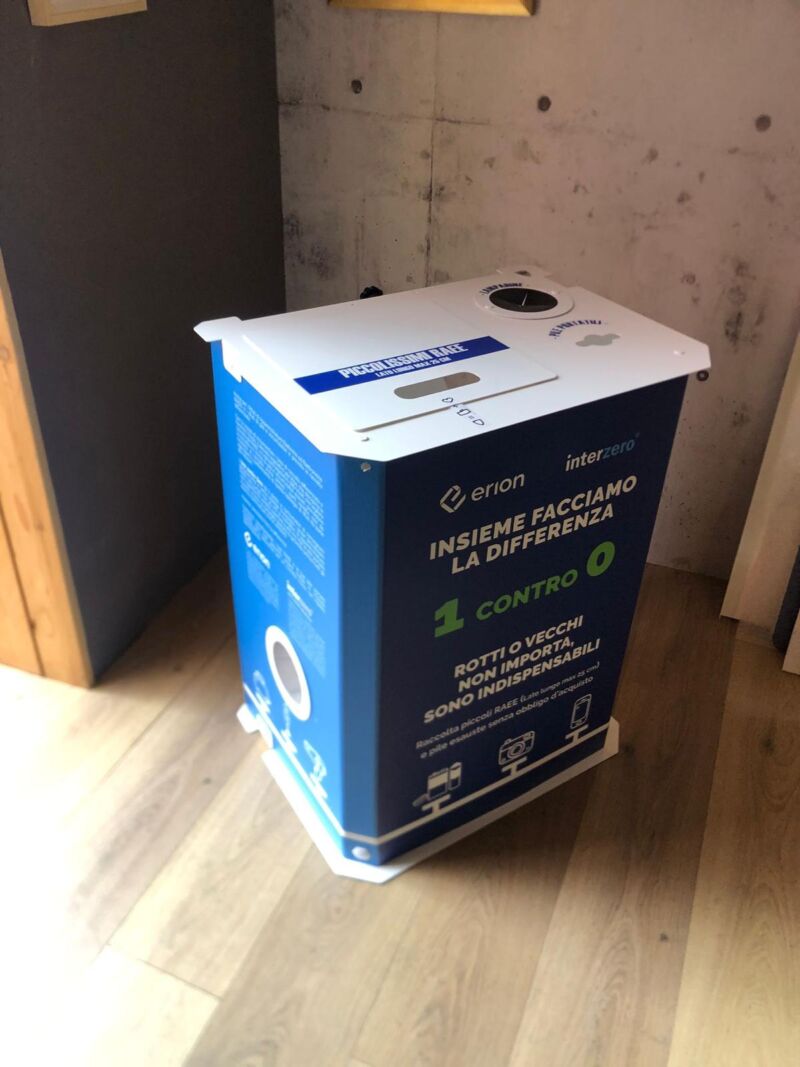
WEEE-station

WELCOME TO THE FASTAND RAEE STATION ASSEMBLY SCHEME

schema montaggio unieuro scaled

Welcome to the assembly section for the new WEEE Station. Follow the instructions step by step. No tools required.

IMG 0047

Open the box, take care not to push the blade too deep to avoid damaging the components inside.

11

The rear door has a label with a QR‑code attached; scan it to return to this section.

IMG 0049

Place the base of the WEEE Station on the ground. Remove the hooks as shown in the photo.

9

Unscrew the fasteners already inserted in the panel holes. There are 4 at the top and 4 at the bottom.

8

Insert the fixing points between the frame and the graphic panel, 4 lower points and 4 upper points.

7

Attention: assemble as shown in the photo, with the frame visible on the outside and the panel on the inside.

2

Counter‑shelf: remove the screws.

1

Refasten the screws between the counter‑door and the door.

IMG 0052

Secure the top panel.

We are almost done, now fit the crowner.

6

Take the crowner.

IMG 0057

Remove the pre‑inserted screws.

5

Secure into the 2 holes on the top panel.

IMG 0060

Assembly of the internal containers

IMG 0061

Follow the steps.

IMG 0062

Follow the steps.

IMG 0063

Follow the steps.

IMG 0064

Follow the steps.

IMG 0065

Follow the steps.

IMG 0067

1 large and 2 small

IMG 0068

Insert the container with the window‑side facing the porthole.

IMG 0069

Insert the container with the window‑side facing the porthole.

IMG 0071

Openable door and closure.

5

Unscrew the pre‑fitted black knob.

IMG 0073

Take the rear closing door.

4

Insert the door into the 2 lower slots.

IMG 0075

The door pivots in the 2 slots.

3

Close the door using the black knob.

IMG 0079

Thank you for setting up a new Fastand WEEE station.

For proper cleaning, please use only standard detergents and paper; the surfaces are moisture-resistant.

Good luck with your work.

2026-09-08T12:00:00+02:00

Share This Post, Choose Your Platform!

WEEE-Station

Willkommen zur Montageanleitung der FASTAND RAEE STATION

schema montaggio unieuro scaled

Willkommen im Bereich für die Montage der neuen RAEE-Station. Folgen Sie Schritt für Schritt den Anweisungen. Es wird kein Werkzeug benötigt.

IMG 0047

Karton öffnen, darauf achten, die Klinge nicht zu tief einzustechen, damit die Teile im Inneren nicht beschädigt werden.

11

Die Rückseite ist mit einem QR-Code-Etikett versehen. Scannen Sie diesen, um zu diesem Abschnitt zurückzukehren.

IMG 0049

Platzieren Sie die Basis der RAEE-Station auf dem Boden. Entfernen Sie die Haken wie auf dem Foto gezeigt.

9

Lösen Sie die Befestigungen, die bereits in die Paneelbohrungen eingesetzt sind. Es gibt 4 obere und 4 untere.

8

Befestigungspunkte zwischen Rahmen und Grafikpaneel einsetzen, 4 untere und 4 obere Punkte.

7

Achtung: Montieren Sie wie auf dem Bild gezeigt, wobei die Struktur außen sichtbar ist und das Paneel innen sitzt.

2

Gegenkonsole: Schrauben entfernen.

1

Schrauben zwischen Gegenklappe und Klappe wieder befestigen.

IMG 0052

Oberplatte befestigen.

Fast geschafft, jetzt kommt der Abschlussrahmen.

6

Den Abschlussrahmen nehmen.

IMG 0057

Vormontierte Schrauben herausnehmen.

5

In den 2 Bohrungen der Platte befestigen.

IMG 0060

Montage der inneren Behälter.

IMG 0061

Folgen Sie den Schritten.

IMG 0062

Folgen Sie den Schritten.

IMG 0063

Folgen Sie den Schritten.

IMG 0064

Folgen Sie den Schritten.

IMG 0065

Folgen Sie den Schritten.

IMG 0067

1 großer und 2 kleine.

IMG 0068

Behälter einsetzen, wobei die Seite mit dem Fenster zum Sichtfenster zeigt.

IMG 0069

Behälter einsetzen, wobei die Seite mit dem Fenster zum Sichtfenster zeigt.

IMG 0071

Öffnbare Klappe und Verschluss.

5

Vormontierten schwarzen Knauf abschrauben.

IMG 0073

Hintere Verschlussklappe nehmen.

4

Klappe in die 2 unteren Einrastungen einsetzen.

IMG 0075

Die Klappe dreht sich um die 2 Einrastungen.

3

Klappe mit dem schwarzen Knauf schließen.

IMG 0079

Vielen Dank für den Aufbau einer neuen RAEE-Station von Fastand.

Für eine korrekte Reinigung verwenden Sie bitte nur herkömmliche Reinigungsmittel und Papier; die Oberflächen sind feuchtigkeitsbeständig.

Gutes Gelingen.

2026-09-09T04:19:54+02:00

Share This Post, Choose Your Platform!

WEEE-station

WELCOME TO THE FASTAND RAEE STATION ASSEMBLY SCHEME

schema montaggio unieuro scaled

Welcome to the assembly section for the new WEEE Station. Follow the instructions step by step. No tools required.

IMG 0047

Open the box, take care not to push the blade too deep to avoid damaging the components inside.

11

The rear door has a label with a QR‑code attached; scan it to return to this section.

IMG 0049

Place the base of the WEEE Station on the ground. Remove the hooks as shown in the photo.

9

Unscrew the fasteners already inserted in the panel holes. There are 4 at the top and 4 at the bottom.

8

Insert the fixing points between the frame and the graphic panel, 4 lower points and 4 upper points.

7

Attention: assemble as shown in the photo, with the frame visible on the outside and the panel on the inside.

2

Counter‑shelf: remove the screws.

1

Refasten the screws between the counter‑door and the door.

IMG 0052

Secure the top panel.

We are almost done, now fit the crowner.

6

Take the crowner.

IMG 0057

Remove the pre‑inserted screws.

5

Secure into the 2 holes on the top panel.

IMG 0060

Assembly of the internal containers

IMG 0061

Follow the steps.

IMG 0062

Follow the steps.

IMG 0063

Follow the steps.

IMG 0064

Follow the steps.

IMG 0065

Follow the steps.

IMG 0067

1 large and 2 small

IMG 0068

Insert the container with the window‑side facing the porthole.

IMG 0069

Insert the container with the window‑side facing the porthole.

IMG 0071

Openable door and closure.

5

Unscrew the pre‑fitted black knob.

IMG 0073

Take the rear closing door.

4

Insert the door into the 2 lower slots.

IMG 0075

The door pivots in the 2 slots.

3

Close the door using the black knob.

IMG 0079

Thank you for setting up a new Fastand WEEE station.

For proper cleaning, please use only standard detergents and paper; the surfaces are moisture-resistant.

Good luck with your work.

2026-09-03T09:11:55+02:00

Share This Post, Choose Your Platform!

Torna in cima